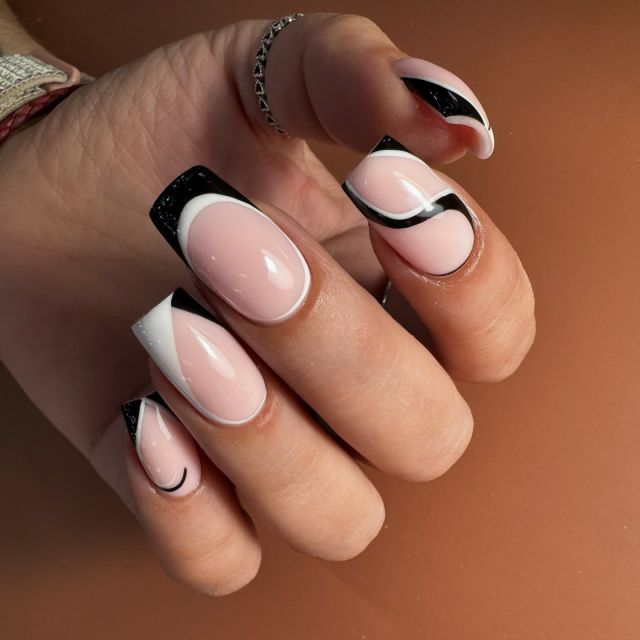
Nail care is an essential part of personal grooming, and among the various techniques available, Russian nail care methods have gained immense popularity for their unique approach and stunning results. These methods focus on not just aesthetics but also the health of the nails and surrounding skin. This article will provide a comprehensive, step-by-step guide to mastering Russian nail care methods, helping you achieve salon-quality results from the comfort of your home.
Understanding Russian Nail Care Methods
Before delving into the specifics, it’s important to understand what makes Russian nail care methods distinctive. Originating in Eastern Europe, these techniques emphasize the following:
- Precision: Russian methods prioritize meticulous attention to detail, ensuring every nail is perfectly shaped and polished.
- Health: The focus is not only on the appearance of nails but also on maintaining their health, preventing breakage, and promoting growth.
- Techniques: Various specialized techniques, including dry manicure and unique filing methods, set Russian care apart from traditional nail care routines.
With this foundation, let’s explore the step-by-step process to master these methods.
Step 1: Gather Your Tools
To effectively utilize Russian nail care methods, you need the right tools. Investing in high-quality supplies will significantly impact your results. Here’s a list of essential tools to gather:
- Nail file: Opt for a glass file or a high-grit file to shape your nails without causing damage.
- Cuticle pusher: A metal cuticle pusher works best for gently pushing back cuticles without causing trauma to the nail bed.
- Cuticle nippers: Use these for trimming excess cuticle, but be cautious to avoid over-cutting.
- Nail buffer: This tool helps smooth the nail surface and adds shine.
- Nail primer: Prepares the nail for polish or enhancements, ensuring better adhesion.
- Top coat and base coat: Essential for a long-lasting finish.
- Nail polish: Choose high-quality nail polish for the best results.
- Moisturizing cream or oil: To hydrate cuticles and the surrounding skin.
Step 2: Prepare Your Nails
Preparation is crucial in Russian nail care methods. Proper preparation ensures that your nails are clean, healthy, and ready for treatment. Follow these steps:
2.1 Clean Your Nails
Start by removing any existing polish with a gentle nail polish remover. Ensure you use an acetone-free formula to prevent drying out your nails. Once the polish is removed, wash your hands thoroughly with soap and water to eliminate any residue.
2.2 Soak Your Hands
Soaking your hands is a common practice in nail care. Fill a bowl with warm water and add a few drops of a moisturizing agent, like olive oil or a gentle soap. Soak your fingers for about 5-10 minutes. This softens the cuticles, making it easier to work with them later.
2.3 Dry Your Hands
After soaking, dry your hands thoroughly with a clean towel. This step is important because moisture left on the nails can affect the adhesion of polish.
Step 3: Push Back Cuticles
In Russian nail care methods, cuticle management is vital. Pushing back the cuticles helps create a neat and polished appearance. Here’s how to do it correctly:
3.1 Use a Cuticle Pusher
Take your metal cuticle pusher and gently push back the cuticles. Start at the base of the nail and work your way around. Be gentle to avoid damaging the cuticle or nail bed.
3.2 Trim Excess Cuticles
If you notice any excess cuticle, carefully use your cuticle nippers to trim it. Be careful not to cut too much, as this can lead to painful hangnails or infection. A good rule of thumb is to only remove what is necessary to achieve a clean look.
Step 4: Shape Your Nails
Shaping your nails is an art that is emphasized in Russian nail care methods. The shape of your nails can drastically change the overall appearance of your hands. Here’s how to achieve the perfect shape:
4.1 Choose Your Nail Shape
Decide on the shape you want for your nails. The most common shapes include:
- Square: Straight across the top with sharp corners.
- Round: Softly rounded edges, following the natural shape of the fingertip.
- Almond: A tapered, oval shape that resembles an almond.
- Coffin: Similar to a ballerina shape, it is square at the tip with tapered sides.
4.2 File Your Nails
Using a glass or high-grit file, gently file your nails into your desired shape. Always file in one direction to avoid splitting the nails. For a more rounded shape, start at the corners and work toward the center of the nail.
4.3 Buff the Nail Surface
Once shaped, use a nail buffer to smooth out any rough edges and add shine to your nails. Buffing should be done gently, as excessive buffing can thin the nail.
Step 5: Clean and Prep the Nail Bed
After shaping and buffing, it’s crucial to clean and prep the nail bed for polish application. Follow these steps:
5.1 Apply Nail Primer
Apply a thin layer of nail primer to each nail. This step is essential as it helps the polish adhere better and prevents chipping.
5.2 Choose Your Base Coat
Select a high-quality base coat that suits your nail type. A good base coat protects the nail from staining and enhances the longevity of your polish. Apply a thin, even layer and let it dry completely.
Step 6: Apply Polish
Now comes the fun part – applying polish! In Russian nail care methods, attention to detail is key. Here’s how to achieve a flawless application:
6.1 Choose Your Polish
Pick a high-quality nail polish in your desired color. Russian methods often favor vibrant and deep colors that enhance the natural beauty of the nails.
6.2 Application Technique
- Start with a Thin Layer: Using the brush, start in the center of the nail and move towards the edges. Apply a thin layer and avoid flooding the cuticles.
- Apply Two Coats: Allow the first coat to dry before applying a second coat for full opacity. Ensure even coverage to prevent streaks.
6.3 Clean Up
After applying the polish, use a small brush dipped in nail polish remover to clean up any mistakes around the cuticles. This gives your nails a neat and professional finish.
Step 7: Top It Off
The final step in the Russian nail care methods is to seal everything in with a top coat. This step enhances the shine and durability of your manicure.
7.1 Apply a Top Coat
Choose a high-gloss top coat for that salon-like shine. Apply a thin layer over your polished nails, ensuring full coverage. Allow it to dry completely to avoid smudging.
7.2 Drying Time
Give your nails ample time to dry. Consider using a quick-dry spray or oil to speed up the drying process, but be careful not to touch anything until you’re sure they are fully dry.
Step 8: Maintain Your Nails
Proper maintenance is crucial to keep your nails looking fabulous. Here are some tips to ensure longevity after using Russian nail care methods:
8.1 Regular Moisturizing
Keep your cuticles and surrounding skin hydrated. Apply a cuticle oil or moisturizer regularly to prevent dryness and cracking.
8.2 Avoid Excessive Water Exposure
Try to minimize prolonged exposure to water, as it can weaken nails and polish. Consider wearing gloves while doing dishes or cleaning.
8.3 Schedule Regular Touch-Ups
To maintain the appearance of your manicure, schedule regular touch-ups every 2-3 weeks. This allows for nail growth and keeps your polish looking fresh.
Benefits of Russian Nail Care Methods
Understanding the advantages of Russian nail care methods can help you appreciate why they are a great choice for maintaining your nails.
Healthier Nails
By focusing on the health of your nails and cuticles, these methods promote stronger, healthier nails. The attention to detail helps prevent issues like breakage and infection.
Longer-Lasting Results
With the emphasis on preparation and high-quality products, manicures using Russian techniques often last longer than traditional methods.
Versatility
Russian nail care methods are versatile and can be adapted to suit various nail types and preferences. Whether you prefer natural looks or bold colors, there’s a technique for everyone.
Aesthetic Appeal
The precision and care taken in these methods result in beautifully manicured nails that are sure to impress.
Conclusion
Mastering Russian nail care methods requires practice, patience, and the right tools. By following this step-by-step guide, you can achieve stunning, healthy nails that reflect your personal style. The key lies in focusing on both the health of your nails and the aesthetics, ensuring that you enjoy beautiful results.


